- Navigate to Plugins > Add New on your WordPress dashboard, then search for Loco Translate. Install and activate the plugin.
![]()
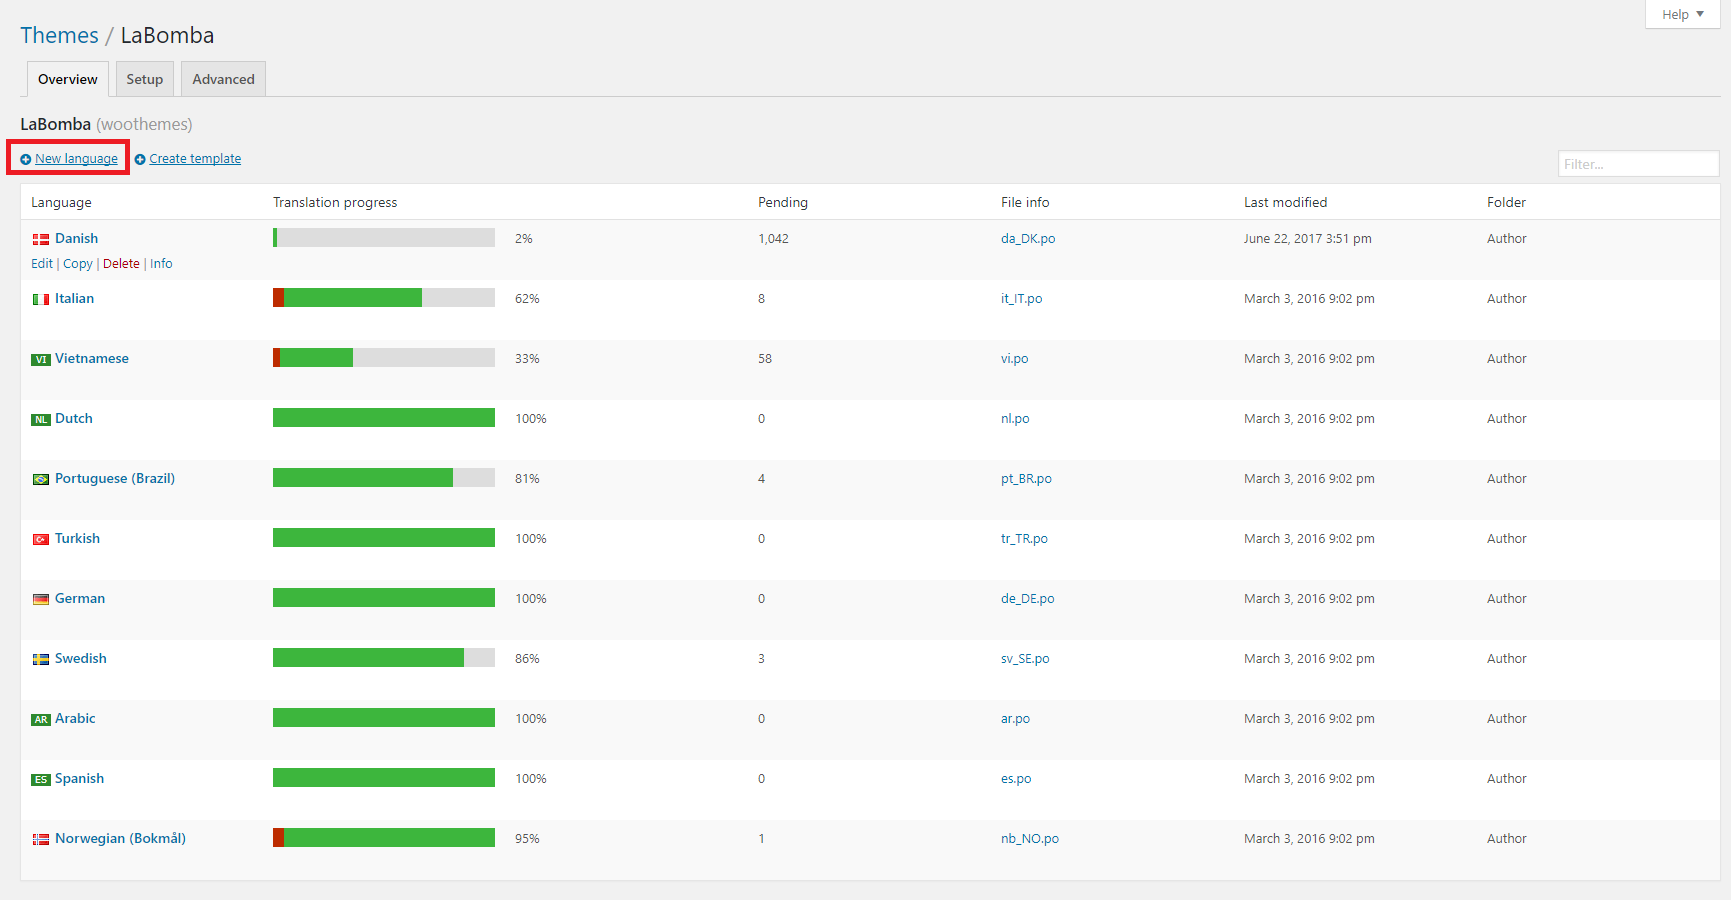
- After activating, go to Loco Translate > Themes from the sidebar menu, then select the theme you want to translate (Labomba).
- then click (+) New Language. you will be asked to choose between creating a template or skip template.
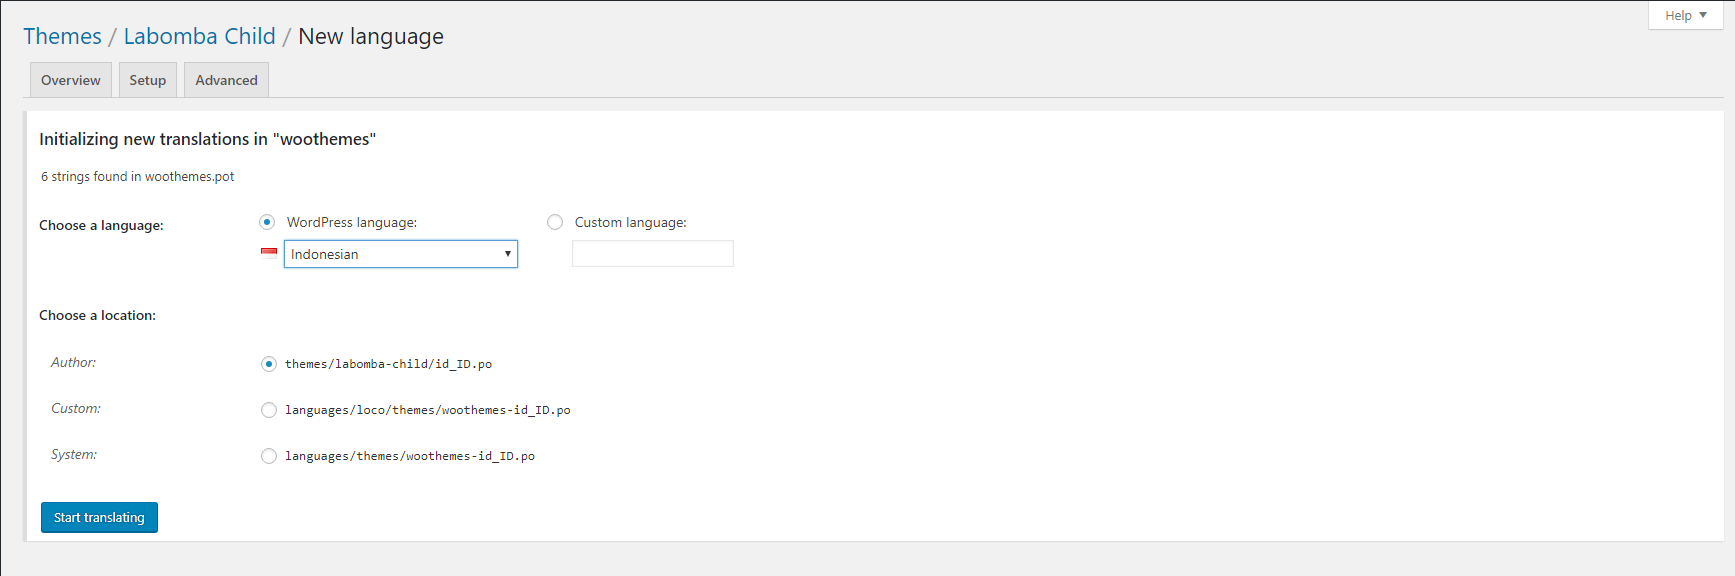
- You can choose skip template. then you will be asked to choose the language that you want to use and translation file location. please make sure the location you choose is Author, then click Start translating
- click the Sync button and You may start your translation now. You can select the text inside the theme you want to translate on the Source Text list, then add the translation on the available translation area. For example, if you want to translate word ‘My Account’, you have to find and select it first on the Source Text list then add the translated text inside the translation box.
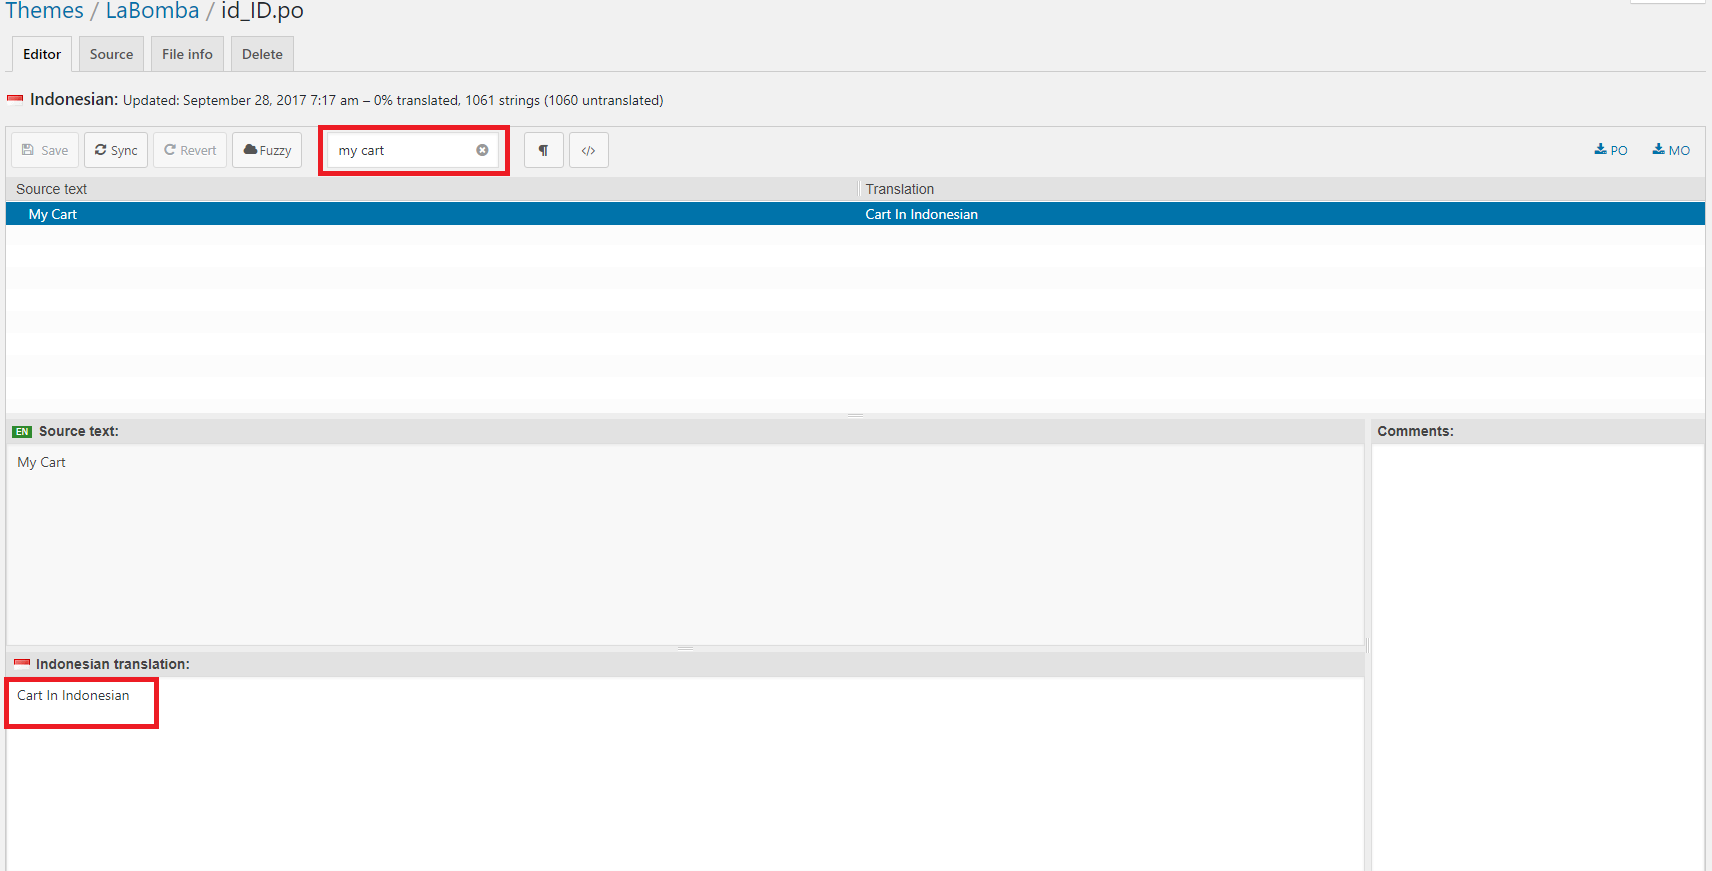
- Repeat for all the strings then Click Save button as you’re done with translating.
- The last step is to activate and use the new language. Go to Settings > General from the sidebar menu. On the bottom of the page, change the language in the Site Language options, then click Save Changes.

Done! The default language both on your WordPress dashboard and on your site has changed.