
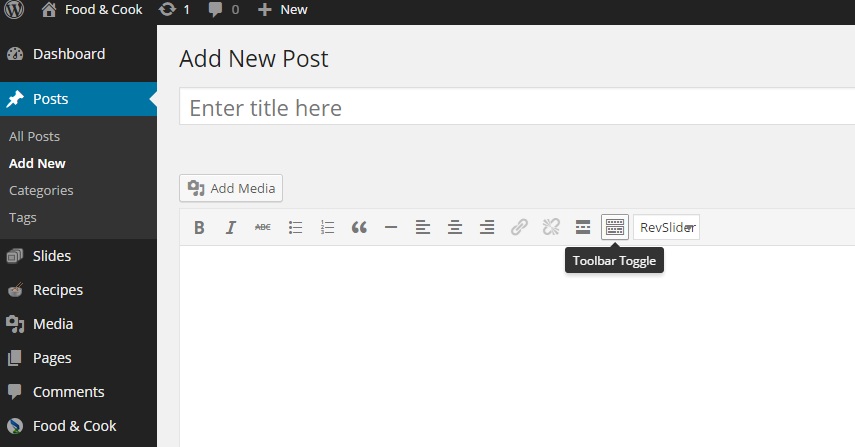
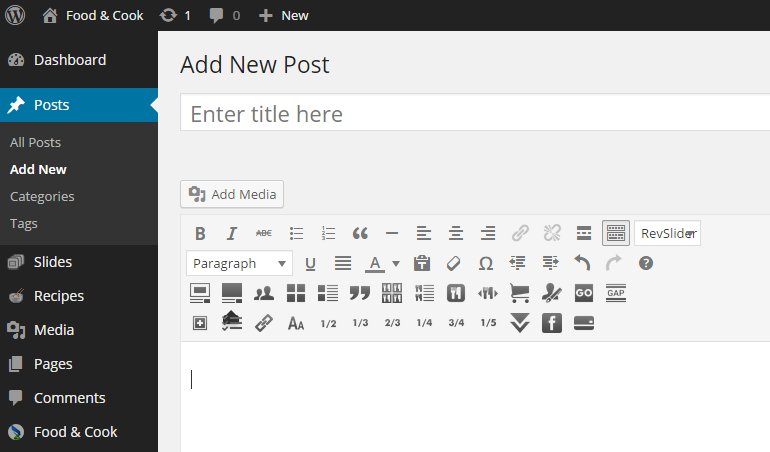
Here list of shortcodes we’ve provided:
MEMBER SHORTCODE
[member name="John Doe" role="Web Developer" url="http://example.com" img="http://www.img.com/as.png" twitter="http://twitter.com" facebook="http://facebook.com" skype="http://skype.com" google="http://google.de" linkedin="http://linkedin.com" mail="[email protected]"]Description[/member]
member name : Fll the next “ ” with member’s name
img : Add your Image URL here. Use 1×1 images for best result
role : Fill the next “ ” with member’s role
Url: Fill the next “ ” with member’s website url
Facebook, skype, google, linkedin, Fill the next “ ” with member’s social media URL respectively
Mail = Fill the next “ ” with member’s email address
Description = Replace with member’s description. You can delete this to disable description.
ADD BLOG (GRID)
[blog posts="4" title="Latest From The Blog" show_title="yes or no" categories="Category slugs or all"]
blog posts= write the number of blog post you want to display with this shortcode.
Title= you can write a heading/title for the shortcode here. Leave it empty (“”) if you don’t want title.
show_title= write “yes” to display title, “no” to hide it
Categories= write your category’s slug if you want to populate from specific category. Or just write “all” to display all your blog posts.
ADD BLOG (LIST)
[bloglist posts="4" title="Latest Blog Entries" show_title= “yes or no" categories="Category slugs or all"]
bloglist posts = Write the number of blog post you want to display with this shortcode.
Title = You can write a heading/title for the shortcode here. Leave it empty (“”) if you don’t want title.
show_title= write “yes” to display title, “no” to hide it
Categories= write your category’s slug if you want to populate from specific category. Or just write “all” to display all your blog posts.
PARALLAX
[parallax img_bg="" height="" padding="" speed="" class=""] your content [/parallax]
parallax img_bg= add the URL of your background image here.
height= set the height of your parallax e.g: in the demo we use “500px”
padding= set the padding for your content inside the parallax e.g: “12px 12px 12px 12px” (padding top right, bottom, left) see padding-properties note below to learn about padding properties.
speed= set the speed of parallax scroll, you can test any number to find the best result. in the demo we use “0.1”.
class= set class with any character if you have more than 1 parallax in one page.
Note : Padding Properties
The padding property can have from one to four values.
“ 25px 50px 75px 100px”
top padding is 25px
right padding is 50px
bottom padding is 75px
left padding is 100px
“25px 50px 75px”
top padding is 25px
right and left paddings are 50px
bottom padding is 75px
“25px 50px”
top and bottom paddings are 25px
right and left paddings are 50px
“25px”
all four paddings are 25px
——–NOTE PADDING-PROPERTIES —–
LINKED MORE LINK
[linked_more title=”other Recipes” link=”http://google.com/” color=”#bf9764″]linked_more title= write down the text for your link
link= add the url that this link will redirect to
color= the color of your link text, please use the color code like the example above. To change the border color you need to change it from theme option.